I have always liked the multiple libraries feature in Mac OS X Photos app. Which is something that DigiKam lacks, even in DigiKam-7. But not anymore 😉

Updated: 2022.10.17:
Add MacOS support.
Intro:
We are going to write a small BASH script to achieve our goal which makes DigiKam capable of managing multiple photo libraries. But before doing that we need to know how does DigiKam work by default.
- DigiKam stores all its application settings like the GUI settings and database’s information in a file called
digikamrcusually lives in~/.config/if it was installed via your distro package manager, or if it was being compiled from the source. But if it was being installed via Flatpak, it will live in ~/.var/app/org.kde.digikam/config/. - DigiKam stores the media’s metadata, media’d thumbnails, image’s finger-prints, media’s information ..etc, in a MySQL (or MariaDB) or SQLite database (default) which we’ll cover it in this article.
Which means, we can either use:
- One global
digikamrcfor all photo libraries. - Letting each photo library have its own
digikamrc.
If we think about it, the second option seems to be better, simply because some settings make sense in some libraries, while they don’t in others. And since DigiKam stores the media’s data in a database, we want to give each library we’re about to create its own digikamrc and its own database files to store all the media’s data it needs about our collections.
Requirements:
Step 1:
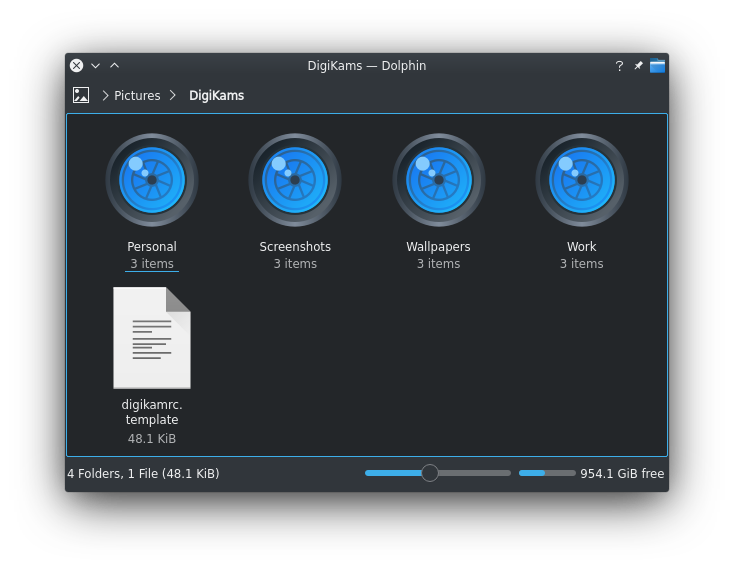
Make a repository directory to store all libraries in. (in this tutorial, we will assume it’s: ~/Pictures/DigiKams/):
mkdir ~/Pictures/DigiKams
Step 2 (optional):
Now, open up the DigiKam and go to Settings -> Configure digiKam. (Or press: Ctrl+Shift+,). And configure it the way you like. Because we’re going to make your configuration you’re about to make the default configuration for each new library you’re going to create. (Of course you can re-configure them later once you open that library).
Step 3:
Now copy that settings file to our repository directory, and rename it to digikamrc.template.
If you have installed DigiKam, via your package manager, type:
cp -v ~/.config/digikamrc ~/Pictures/DigiKams/digikamrc.template
If you have installed DigiKam, via Flatpak, type:
cp -v ~/.var/app/org.kde.digikam/config/digikamrc ~/Pictures/DigiKams/digikamrc.template
If you’re using DigiKam on MacOS, type the following, then ignore Step 4:
cp -v ~/Library/Preferences/digikamrc ~/Pictures/DigiKams/digikamrc.template
If the digikamrc wasn’t in one of the previous locations, then try to find it by typing:
find ~ -type f -name digikamrc
Step 4:
Remove all values from the database variables in our digikamrc.template. (Remember, the assumed repository path is: ~/Pictures/DigiKams/, see: Step 1):
sed -i "s,Database Name=.*,Database Name=,g" "${HOME}/Pictures/DigiKams/digikamrc.template"
sed -i "s,Database Name Face=.*,Database Name Face=,g" "${HOME}/Pictures/DigiKams/digikamrc.template"
sed -i "s,Database Name Similarity=.*,Database Name Similarity=,g" "${HOME}/Pictures/DigiKams/digikamrc.template"
sed -i "s,Database Name Thumbnails=.*,Database Name Thumbnails=,g" "${HOME}/Pictures/DigiKams/digikamrc.template"
Step 5:
Clone our DigiKam multiple libraries repository:
git clone https://gitlab.com/unix.cafe/digikam-multiple-libraries /tmp/digikamctl
Now, let’s open the /tmp/digikamctl/digikamctl script in your favorite text editor and configure it.
First, we need to modify the value of the variable REPO, to match our repository location. (See: Step 1)
REPO="${HOME}/Pictures/DigiKams"Second, we need to use the correct edition of our DigiKam, if it was installed via the package manager it is 1, if Flatpak was used to install our DigiKam, then it is 2, and if you’re using DigiKam on MacOS 3.
EDITION=1
That’s it. Now, let’s make sure digikamctl is executable and moved to the right location:
sudo mv /tmp/digikamctl/digikamctl /usr/local/bin/
sudo chown 0:0 /usr/local/bin/digikamctl
sudo chmod a+x /usr/local/bin/digikamctl
Usage:
List your available libraries:
digikamctl ls
~/Pictures/DigiKams/.Create a new library (e.g: Work):
digikamctl new Work
Work in ~/Pictures/DigiKams/ Then copy ~/Pictures/DigiKams/digikamrc.template to ~/Pictures/DigiKams/Work/.Activate library (e.g: Work):
digikamctl use Work
~/.config/digikamrc or ~/.var/app/org.kde.digikam/config/digikamrc (based on you digikam installation method), that points to the ~/Pictures/DigiKams/Work/digikamrc.Activate and open library (e.g: Personal):
digikamctl open Personal
digikamctl use Personal does, if it wasn’t activated. Then open DigiKam application.Remove library (e.g: Work):
digikamctl rm Work
digikamrc and the database files that associated with the library. In other words, it will remove this folder ~/Pictures/DigiKams/library-name/ and all its contents.Show help:
digikamctl help
Enjoy your enhanced DigiKam 😉
I am using digiKam on Mac OS X 12.6.
Does anyone know how to achieve multiple libraries for Mac OS X?
Thanks a lot
Hello @WG,
I have updated the post as well as the script, to make it usable on MacOS X.
Regards
Thanks for the MacOS X update! It works perfectly!
The only problem I ran into was using BBEdit to edit digikamctl.
BBEdit adds a com.apple.quarantine extended attribute to the file after saving it,
what makes digikamctl not executable.
The solution for this can be changen in BBEdit Preferences (Allow Sandbox access)
https://www.barebones.com/support/bbedit/quarantine.html
Is there a way to do this in Windows 11? My main OS is openSUSE and it’s working great but I would like to get it working in my Windows 11 install also. Thanks.
Hello Tim,
The last windows I had my hands on was windows XP. Yet I think you might be able to get it to work with WSL? (Windows subsystem linux).
Let us know if it worked.
I tried running these thru gow as wsl will not work for me, but I’m pretty sure I still need to modify the code, since its still windows filepaths. Any help, please?
Hello Lys,
This video might help you with WSL: https://www.youtube.com/watch?v=qYlgUDKKK5A
is there a way to make this work using a mysql server with a network connected library and a local library?